
미래학자
우버 클론 코딩 (nomad coders) #2 본문
#1.8 Graphql To Typescript
-
src/hello/sayHello/sayHello.graphql 파일을 다음처럼 수정한 후 서버를 재시작 해보자.
  type Greeting {
    text: String!
    error: Boolean!
  }

  type Query {
    sayHello: Greeting!
  }
sayHello 쿼리의 타입을 Greeting으로 변경을 했다.
-
src/api/hello/sayHello/sayHello.resolvers.ts
  const resolvers = {
    Query: {
      sayHello: () => "Hey Hello how are ya"
    }
  }

  export default resolvers;
그런데 resolver에서는 여전히 string을 리턴한다. 정의한 스키마와 실제 코드 사이에 다른 타입을 처리하도록 되어 있지만, 타입스크립트에서 이를 알아채지 못한다. 물론 http://localhost:4000/playground 에 들어가서 sayHello를 호출 했을 때 에러는 난다. 어쨋든 타입스크립트에서 이런 타입문제를 알려줘야 한다.
아래의 모듈들이 이런 타입체킹을 도와줄 것이다.
$ yarn add graphql-to-typescript gql-merge --dev이렇게 한 후 아직 코드는 변경하지 않고 스크립트를 추가 해야 한다.
graphql-to-typescript 모듈은 쿼리을 정의한 graphql 파일을 typescript로 변경해주는데, 이 모듈을 실행하기 전에 여러 파일로 정의된 graphql을 하나의 파일로 합쳐주는 것이 필요하다 그 역할을 하는게 gql-merge다.
-
package.json
{ ..., "dependencies": { ... }, "devDependencies": { ... }, "scripts": { "dev": "cd src && nodemon --exec ts-node index.ts -e ts,graphql", "pretypes": "gql-merge --out-file ./src/schema.graphql ./src/api/**/*.graphql", "types": "graphql-to-typescript ./src/schema.graphql ./src/types/graph.d.ts" } }pretypes명령어는 gql-merge를 이용하여 ./src/schema.graphql 에 하나의 파일로 합친다.types명령어는 graphql-to-thypescript를 이용하여 ./src/schema.graphql에 graphql 스키마 정의를 ./src/types/graph.d.ts 타입스크립트 파일로 만든다. (d.ts 는 definition.typescript로 vscode가 알아서 타입 정의 파일인것을 인지한다.)
이제 타입 정의 파일을 생성해보자. 아마 babel-runtime 모듈이 없다고 뜰 건데 설치해주자.
그리고 타입 정의 파일이 생성될 디렉토리도 먼저 만들어주자.
$ yarn add babel-runtime --dev
$ mkdir src/types    # src/types 빈 디렉토리 생성
$ yarn types
명령어가 제대로 실행되었다면,
src/schema.graphql, src/types/graph.d.ts 파일이 생성된 것을 볼 수 있다.
이제 우리가 할 것은 d.ts을 통해 타입스크립트에 타입을 명시해주는 것이다.
-
src/api/hello/sayHello/sayHello.resolvers.ts
  import { Greeting } from "src/types/graph";

  const resolvers = {
    Query: {
      sayHello: () : Greeting => {
        return {
          error: true,
          text: "good!"
        }
      }
    }
  }

  export default resolvers;
특히 위 코드를 입력할 때 import를 하지 않고 타입만 써주면 auto import 해준다.!
서버 재시작 후 http://localhost:4000/playground 에 가서 다음의 쿼리를 입력하면 우리가 정의한 결과가 제대로 나오는 것을 확인 할 수 있다.
query {
    sayHello {
    error
    text
  }
}
#1.9 Typechecking Graphql Arguments
1.8 절에서 설정한 것들이 얼마나 멋진일인지를 확인할 수 있다.
-
src/api/hello/sayHello/sayHello.graphql sayHello 쿼리에 인자를 추가하자
type Greeting {
  text: String!
  error: Boolean!
}

type Query {
  sayHello(name: String!): Greeting!
}
src/api/hello/sayHello/sayHello.graphql sayHello 쿼리에 인자를 추가하자
그리고 타입을 생성하는 스크립트를 돌리자 yarn types
그러면 graph.d.ts 파일에 SayHelloQueryArgs 인터페이스가 정의되어 있을 것이다. 진짜 멋지다.
바꾼김에 조금만 더 작업을 해보자.
-
src/api/hello/sayHello/sayHello.graphql 의 파일을
  type SayHelloResponse {
    text: String!
    error: Boolean!
  }

  type Query {
    sayHello(name: String!): SayHelloResponse!
  }
.graphql 파일을 변경하면 yarn types를 꼭 해주자.
-
src/api/hell/sayHello/sayHello.resolvers.ts
import { SayHelloQueryArgs, SayHelloResponse } from "src/types/graph"; // 모든 resolver는 parent, args, context를 전달받게 되어 있다. // 우리가 필요한 것은 args뿐이므로 parent는 _로 적어준다.(_는 사용하지 않음으로 암묵적으로 의미한다.) const resolvers = { Query: { sayHello: (_, args: SayHelloQueryArgs) : SayHelloResponse => { return { error: true, text: `hello ${args.name}` } } } } export default resolvers; -
http://localhost:4000/playground 에서 쿼리를 날려보자.
  query {
      sayHello(name: "tamm") {
      error
      text
    }
  }

  # 응답
  {
    "data": {
      "sayHello": {
        "error": true,
        "text": "hello tamm"
      }
    }
  }
이건 진짜 멋진 같다.
#1.10 Configuring TypeORM
이번에는 데이터 베이스를 연결할 껀데, typeORM을 사용할 거다. typeORM은 타입스크립트를 지원하기 떄문에 딱 어울린다.
https://github.com/typeorm/typeorm
-
우선 typeorm을 설치하자
$ yarn add typeorm
app.ts 에서 데이터 베이스를 연결한 후 app을 실행하도록 해야한다.
src/entities 디렉토리를 생성한다. 이 디렉토리에는 데이터 베이스 스키마 정의가 들어간다. 지금은 빈 디렉토리다.
-
src/ormConfig.ts 파일에는 데이터 베이스 연결 정보를 셋팅한다.
  import { ConnectionOptions } from 'typeorm'

  const ConnectionOptions: ConnectionOptions = {
    type: "postgres",
    database: "nuber",
    synchronize: true,
    logging: true,
    entities: [
      "entities/**/*.*"
    ],
    host: process.env.DB_ENDPOINT || "localhost",
    port: 5432,
    username: process.env.DB_USERNAME || "tamm",
    password: process.env.DB_PASSWORD || ""
  };

  export default ConnectionOptions;
이 프로젝트에서는 postgresql 를 사용한다.
postgresql 은 각자 환경에 맞게 설치하자. 그리고 실행하자.
-
맥이라면
  $ brew install postgresql
  $ postres -D /usr/local/var/postres
postgresql을 사용하기에 앞서 나는 위에서 tamm이라는 유저가 nuber라는 데이터 베이스를 사용하길 원한다. tamm이라는 유저를 생성하고, tamm 유저가 사용할 수 있는 nuber라는 데이터 베이스를 생성할 거다. 다음과 같이 뜨면 성공
$ createuser tamm
$ createdb -O tamm nuber     # -O 옵션은 권한을 가질 대상이다.
$ psql -U tamm number

psql (11.2) # 필자 기준
Type "help" for help.

number=> []
데이터 베이스 설정을 마쳤고, 이제 앱이 실행될 때 데이터 베이스를 연결하도록 src/index.ts를 수정하자.
-
src/index.ts
  import { Options } from 'graphql-yoga';
  import { createConnection } from 'typeorm';
  import app from './app';
  import ConnectionOptions from './ormConfig';

  ...

  const handleAppStat = () => console.log(`Listening on port ${PORT}`)
  createConnection(ConnectionOptions).then(_ => {
    app.start(appOptions, handleAppStat);
  });
자, 모든 설정을 맞췄다. typeorm에서 postgresql을 사용하려면 pg라는 모듈을 의존하는 것 같다. pg 모듈을 추가해주자. pg 모듈의 설명은 참고로 다음과 같다
pg : Non-blocking PostgreSQL client for Node.js. Pure JavaScript and optional native libpq bindings.
$ yarn add pg --dev
$ yarn dev

[nodemon] 1.18.10
[nodemon] to restart at any time, enter `rs`
[nodemon] watching: *.*
[nodemon] starting `ts-node index.ts`
query: START TRANSACTION
query: COMMIT
Listening on port 4000
postgresql이 연결되어 TRANSACTION을 시작한다. 이런 로그가 나오는 이유는 src/ormConfig.ts에서 logging: true 옵션을 주었기 때문이다. src/entities 디렉토리에 파일이 더 추가되면 이런 로그가 많아진다고 한다.
#1.11 Creating a Virtual Environment on NodeJS
이번에는 dotenv 모듈로 위에서 사용한 process.env.DB_ENDPOINT || "localhost"같은 표현을 없앨 것이다.
우선 dotenv 모듈을 설치하자. 굉장히 굉장히 유용하면서도 많이 사용되는 모듈이다.
$ yarn add dotenvdotenv모듈은 src/.env 파일을 입력을 받는데, 만들어서 값을 입력하자
-
src/.env
DB_ENDPOINT=localhosta DB_USERNAME=tamm DB_PASSWORD= -
src/ormConfig.ts 깔끔하게 process.env에서 가져오도록 한다.
  import { ConnectionOptions } from 'typeorm'

  const ConnectionOptions: ConnectionOptions = {
    type: "postgres",
    database: "nuber",
    synchronize: true,
    logging: true,
    entities: [
      "entities/**/*.*"
    ],
    host: process.env.DB_ENDPOINT,
    port: 5432,
    username: process.env.DB_USERNAME,
    password: process.env.DB_PASSWORD
  };

  export default ConnectionOptions;
그런데 이렇게 쓰려면 dotenv 프로젝트가 실행될 때 셋팅을 하도록 해야 하는데
-
index.ts 에서 앱 시작할 때 설정 파일을 읽도록 하자.
  import dotenv from 'dotenv';
  dotenv.config();
  import { Options } from 'graphql-yoga';
  import { createConnection } from 'typeorm';
  ...
됐다. 이제 정상적으로 실행될 것이다.
src/.env 파일의 DB_ENDPOINT=localhosta 로 바꾸고 다시 실행하면 에러가 발생해야 한다.
-
index.ts 에서 데이터 베이스를 연결할 때 실패에 대한 catch를 추가하자.
  import dotenv from 'dotenv';
  dotenv.config();
  ...

  createConnection(ConnectionOptions).then(_ => {
    app.start(appOptions, handleAppStat);
  }).catch(error => console.log(error))
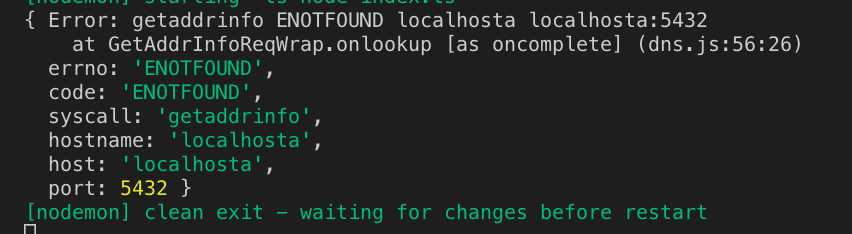
단순히 출력을 하도록 했지만 어쨋든 더 자세한 에러 로그를 얻게 됐다. 이제
src/.env 파일의 DB_ENDPOINT=localhost 로 원상 복구하자.
지금까지 dotenv로 환경설정을 넣는 것을 했다.
'nomad corders' 카테고리의 다른 글
| 우버 클론 코딩 (nomad coders) #6 (0) | 2019.04.15 |
|---|---|
| 우버 클론 코딩 (nomad coders) #5 (0) | 2019.04.12 |
| 우버 클론 코딩 (nomad coders) #4 (0) | 2019.04.11 |
| 우버 클론 코딩 (nomad coders) #3 (2) | 2019.04.10 |
| 우버 클론 코딩 (nomad coders) #1 (1) | 2019.04.07 |


